|
E-mail software you can set up to access your e-mail on your PC:
E-mail software you can set up to access your e-mail on your Mac:
Microsoft Outlook® Express (PC)
Outlook® Express allows you to add a new e-mail account to your existing profile. This means you do not have to replace your current settings in order to send and receive EZ2 e-mail messages. To add a new e-mail account to your existing profile:
- From the Tools menu, choose "Accounts."
- Select the "Mail" tab.
- Click the "Add" button.
- From the Add menu, click "Mail".
- In the text box labeled Display Name, type your name and click "Next".
- In the Email Address box, type your full email address (e.g., john@example.com).
- Select "POP3" to answer the question "My incoming mail server is a..."
- Type "mail." followed by your domain name (e.g. mail.example.com) in the Incoming Mail (POP3, IMAP, or HTTP) Server box.
- Type "mail." followed by your domain name (e.g. mail.example.com) in the Outgoing Mail (SMTP) Server box.
- Note: Some ISPs will not allow you to use EZ2 outbound mail servers. If that is the case, type in the name of your ISPs outgoing e-mail server (ex. mail.myisp.com). You may also try and configure EZ2 Outbound Mail server to connect to Port 2525 instead of the default Port 25.
- Click "Next"
- In the Account Name box, type your full email address (e.g., john@example.com).
- In the Password box, type your password.
- If you want Outlook® Express to remember your password, check the "Remember password" box.
- Do not check the "Log on using secure password" box.
- Click "Next"
- Click "Finish"
EZ2 Outgoing Mail Servers require authentication. To turn this setting on, see How Do I Enable SMTP Authentication.
Back to top
Microsoft Outlook® 2003 and Outlook 2002/Outlook XP (PC)
Outlook allows you to add a new email account to your existing profile. This means you do not have to replace your current settings in order to send and receive EZ2 e-mail messages. To configure your POP settings for Microsoft Outlook® 2002 (sometimes referred to as Outlook® XP) and 2003:
- From the Tools menu, select "Email Accounts." (If you do not see "Accounts," place your cursor over the two arrows at the bottom of the list to display more choices.)
- Select the radio button next to "Add a new email account" and click the "Next" button.
- Select the radio button next to "POP3" and click the "Next" button.
- Enter the following information:
-
User Information
-
Server Information
-
Login Information
-
User Name: Enter your full EZ2' Email Address.
-
Password: Enter your password.
-
Do not check the box next to "Log on using Secure Password Authentication (SPA)."
-
Click the "More Settings" box and select the "Outgoing Server" tab.
-
Check the box next to "My outgoing server (SMTP) requires authentication."
EZ2 Outgoing Mail Servers require authentication. To turn this setting on, see How Do I Enable SMTP Authentication. This is not needed if you already checked the box next "My outgoing server (SMTP) requires authentication".
Back to top
Microsoft Outlook® 2000 and Outlook® 98 (PC)
Outlook allows you to add a new email account to your existing profile. This means you do not have to replace your current settings in order to send and receive EZ2 e-mail messages.
Unfortunately, Microsoft Outlook® 97 does not support authenticated SMTP, and thus Microsoft Outlook® 97 cannot be used to send mail through EZ2 Outgoing Mail servers.
To add a new email account to your existing profile:
- From the Tools menu, choose "Accounts."
- Click the "Add" button.
- From the Add menu, click "Mail".
- In the Display Name box, type your name as you would like it to appear when you send a message, and then click "Next".
- In the E-Mail Address text box, enter your email address (e.g. john@example.com), and then click "Next".
- In the box labeled "My incoming mail server is a..." select "POP3" server.
- Type "mail." followed by your domain name (e.g. mail.example.com) in the Incoming Mail Server box.
- Type "mail." followed by your domain name (e.g. mail.example.com) in the Outgoing Mail (SMTP) Server box.
- Note: Some ISPs will not allow you to use EZ2 outbound mail servers. If that is the case, type in the name of your ISPs outgoing e-mail server (ex. mail.myisp.com). You may also try and configure EZ2 Outbound Mail server to connect to Port 2525 instead of the default Port 25.
- Click "Next".
- In the Account Name box, enter your full email address (e.g., john@example.com).
- In the Password box, enter your password.
- Do not check "Log On Using Secure Password Authentication (SPA)."
- Click "Next".
- Type a name for your new Internet email account.
- Choose the appropriate connection type under the "Which Method Do You Use to Connect to the Internet" heading.
- If you chose "Connect using my phone line," you will need to select a dial-up connection in the Dial-up Connection Wizard and click "Next".
- Click "Finish."
EZ2 Outgoing Mail Servers require authentication. To turn this setting on, see How Do I Enable SMTP Authentication.
Back to top
Eudora 7.x (PC)
Versions 5.1 and higher of Eudora Pro allow you to set up multiple email accounts, so you don't have to replace your current POP and SMTP settings in order to send and receive new EZ2 Email messages.
- Click on the "Tools" menu and select "Personalities."
- Right-click in the "Personalities" box (on the left of the screen) and select "New".
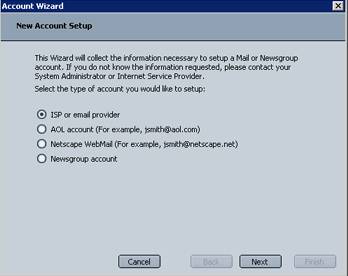
- The New Account Wizard will take you through the setup.
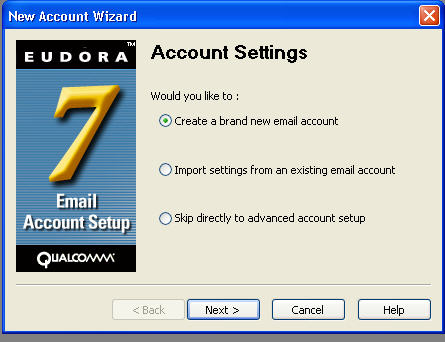
- Use these settings on the screens that follow: (each field may appear on it's own screen so that you will need to click on the Next > button after each entry)
- Account Settings: Select "Create a new account."
- Personality Name: Enter a descriptive name for your email account (e.g. My example.com email)
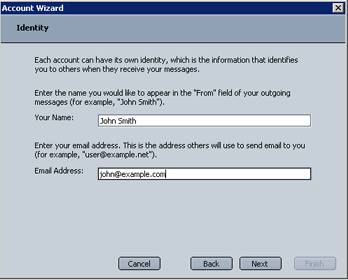
- Personal Information: Enter your name as you want it to appear on the "From" line of your outgoing email.
- Email Address: Enter your full email address (e.g., john@example.com).
- Login Name: Re-enter your full email address (e.g. john@example.com)
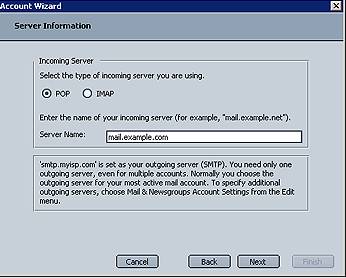
- Incoming Email Server: Type: "mail." followed by your domain name (e.g. mail.example.com) and make sure that "POP" is selected at the bottom.
- Outgoing Email Server: Type: "mail." followed by your domain name (e.g. mail.example.com) in the Outgoing Mail (SMTP) Server box.
- Note: Some ISPs will not allow you to use EZ2' outbound mail servers. If that is the case, type in the name of your ISPs outgoing e-mail server (ex. mail.myisp.com). You may also try and configure EZ2' Outbound Mail server to connect to Port 2525 instead of the default Port 25.
- Check the box next to "Allow authentication." Note that Eudora will attempt to connect with your mail server at this point. It may take a minute for this to occur. When the connection has been established it will notify you and you can continue.
- The Success screen appears to confirm that you have completed the setup process.
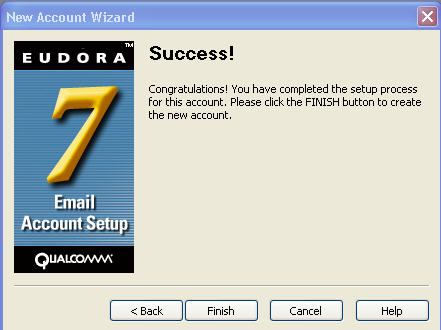
- Click the "Finish" button when you are done.
Back to top
Netscape Messenger 7.x or 6.2 (PC)
Setting up the outgoing (SMTP) server
- Open Netscape
- Click the mail icon in the lower left corner
- Click EDIT
- Click MAIL AND NEWSGROUP settings
- For the Outgoing (SMTP) mail server please enter the server name for your ISPs outgoing mail server. Your SMTP host is generally "mail." followed by the domain name of your ISP (ex. mail.example.com).
Setting up the incoming (POP3) server
- Open Netscape.
- Click the mail icon in the lower left corner.
- Click EDIT.
- Click MAIL AND NEWSGROUPS settings.
- Click NEW ACCOUNT.
- Select ISP OR E-MAIL PROVIDER.
- Click NEXT.
- Enter your name as you would like it to appear in the recipients Inbox.
- Enter your full e-mail address.
- Click NEXT.
- Select POP.
- In Server Name box, enter "mail." followed by your domain name (ex. mail.example.com).
- Click NEXT.
- In the User Name field, enter your full e-mail address (ex. john@example.com)
- On the next window enter any name you would like for Netscape to recall these settings.
- Click FINISH.
Back to top
Netscape Messenger 4.x
When you first install Netscape 4.x, you will have the option to set up your mailbox by entering your POP3 host, your SMTP host, and your user name. For your POP3 host, enter "mail" followed by your domain name (ex: mail.john.com). Your SMTP host is generally "mail." followed by the domain name of your ISP (ex. mail.myisp.com). Your user name is your full e-mail address with the "@" replaced by a "%" (ex. john%example.com).
To edit your mail preferences in Netscape 4.x:
- Select PREFERENCES from the Edit menu.
- Select Mail & Newsgroups. (If you do not have Mail & Newsgroups as an option, you have installed the stand-alone version of Netscape. In order to use Netscape as a mail program, you need to install the full version of Netscape with Messenger Mailbox.)
- Select Mail Servers, and enter your POP3 host, your SMTP host, and your e-mail address. For your POP3 host, enter "mail" followed by your domain name. (Ex: mail.john.com). Your SMTP host is generally "mail." followed by the domain name of your ISP (ex. mail.myisp.com). Your user name is your full e-mail address with the "@" replaced by a "%" (ex. john%example.com).
Back to top
Pegasus (PC)
If you are running Pegasus for the first time, it will automatically present you with a screen entitled PEGASUS MAIL OPTIONS AND PREFERENCE SETTINGS with several boxes for you to fill out.
If you are reconfiguring Pegasus (i.e. if you have previously used it with another e-mail account), select NETWORK CONFIGURATION from the FILE menu to reach this screen.
Then enter the following information:
- Click TOOLS, then INTERNET OPTIONS.
- Under the GENERAL tab click the START SETUP WIZARD button.
- Enter your full e-mail address (ex john@example.com) then click NEXT.
- Enter your POP3 server name. Your POP3, or incoming server name is "pop." followed by your domain name (ex. pop.example.com) then click NEXT.
- Enter your full e-mail address for your USER NAME (ex. john@example.com) then enter your password in the PASSWORD box. Then click NEXT.
- Enter your SMTP or outgoing server information. Your SMTP server is assigned by your ISP, it is generally "mail." followed by the domain name of your ISP (ex. mail.myisp.com). Then click NEXT.
- Select your connection method, then click NEXT.
- Click FINISH.
Back to top
Mail for OS X (Mac)
- Open the Mail program
- From the FILE menu, choose "Add Account". Alternatively, you can click the + button in the lower left corner of the screen reached by selecting the menu path "Mail > Preferences".
- A screen will pop up allowing you to specify the particulars for your account.
- Select the Account Type "POP" or "IMAP".
- In the "Account Description" field enter a name for your account; you may choose anything you wish.
- Please enter your full e-mail address in the "Email Address" field (ex. john@example.com).
- In the "Full Name" field, please enter your name as you would like it to display in the "From" field of your outgoing messages (ex. John Smith).
- Click "Continue".
- In the "Incoming Mail Server" field, please enter "mail." followed by your domain name (ex. mail.example.com).
- Enter your full email address in the "User Name" field (ex. john@example.com).
- Enter your password in the "Password" field.
- Click "Continue".
- At this point the software will verify that your incoming mail server can be reached, which may take a minute or two to accomplish. Once it establishes a connection, it will notify you and you may proceed.
- Use the following settings for your Outgoing Server information:
- OUTGOING MAIL SERVER type "mail." followed by your domain name (e.g. mail.example.com) in the Outgoing Mail (SMTP) Server box.
- Note: Some ISPs will not allow you to use EZ2' outbound mail servers. If that is the case, type in the name of your ISPs outgoing e-mail server (ex. mail.myisp.com). You may also try and configure EZ2' Outbound Mail server to connect to Port 2525 instead of the default Port 25.
- Use Authentication: make sure the checkbox is selected.
- User Name: Re-enter your full Email Address.
- Password: Re-enter your email password.
- Click "Continue".
- Once again the mail software will attempt to verify a connection to your outgoing mail server. This may take a minute or two to accomplish. Once the connection has been established, you will see an account summary box with the information you added.
- On the Outgoing Mail Security pop-up, select "Password" from the drop-down menu in the "Authentication" field.

- Click "Continue" to finish creating the account.
- You will see a summary of the information you just set up.
- Click "Continue" again.
- A confirmation will appear stating that your email box has been created.
- If you would like to create another account click "Create Another Account"; otherwise, click "Done" to close the box.
Back to top
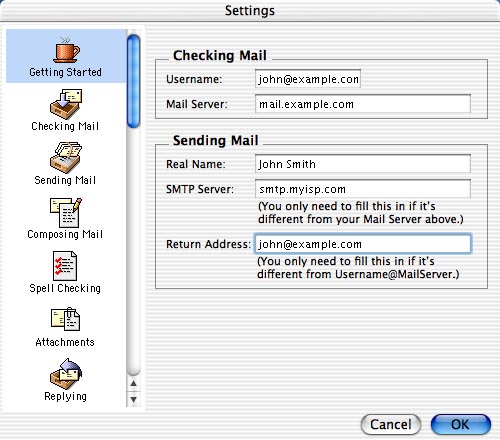
Eudora 6.x (Mac)
- Open Eudora.
- From the EUDORA menu, select PREFERENCES.
- This will open the GETTING STARTED window.
- In the USER NAME field, enter your full e-mail address (ex. john@example.com).
- In the MAIL SERVER field, type "mail." Followed by your domain name (ex. mail.example.com).
- Enter your name as you would like it to appear on your outgoing messages in the REAL NAME field (ex. John Smith).
- In the SMTP SERVER field enter the name of your ISP's outgoing mail server (ex. mail.myisp.com). Your SMTP server is generally "mail." Followed by the domain name of your ISP (ex. mail.myisp.com).
- In the RETURN ADDRESS field please enter your full e-mail address (ex. john@example.com), then click OK.
Back to top
Microsoft Entourage (Mac)
- Open Microsoft Entourage.
- From the TOOLS menu select ACCOUNTS, this will open the accounts window.
- Select NEW.
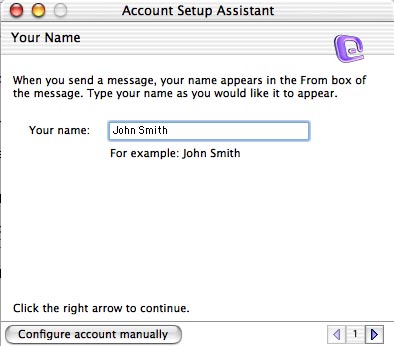
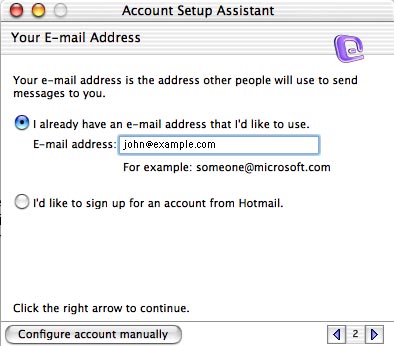
- The "Account Setup Assistant" will launch, please enter your name as you would like it to appear in the "From" line of your outgoing messages (ex. John Smith).
- Click the arrow in the lower right corner to proceed.
- Select "I already have an address that I'd like to use" and enter your full email address in the box (ex. john@example.com).
- Click the arrow in the lower right corner to proceed.
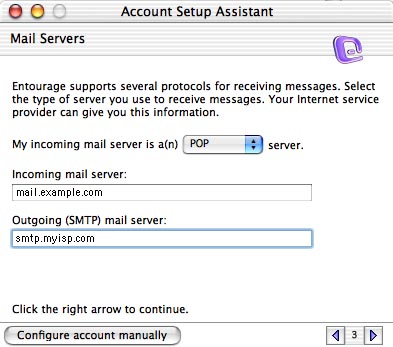
- The next step will ask you about the server, please select POP or IMAP from the drop down list.
- In the Incoming Mail Server field enter "mail." followed by your domain name (ex. mail.example.com).
- Enter your ISP's server in the Outgoing (SMTP) Mail Server field. Your SMTP server is generally "mail." followed by the domain name of your ISP (ex. mail.myisp.com).
- Click the arrow in the lower right corner to proceed.
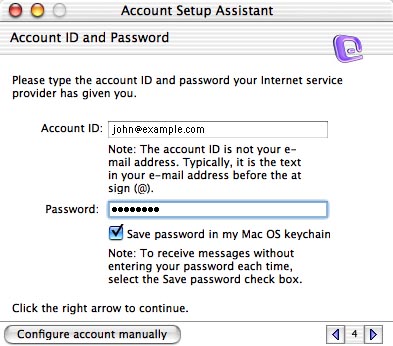
- In the Account ID field, please enter your full e-mail address (ex.john@example.com) -- even though the note below the field says that it is not your email address.
- If you would like Entourage to remember your password, please enter your password in the PASSWORD box and select "save password in my Mac OS keychain".
- Click the arrow in the lower right corner to proceed.
- In the ACCOUNT NAME field, enter any name that you wish to call this setup (ex. john@example.com).
- Place a check in "Include this account in my Send & Receive All schedule".
- Click Finish.
Back to top
Microsoft Outlook® Express for OS 9 (Mac)
- In Outlook® Express, go to the Edit menu and select Preferences.
- A window will appear listing the mail, news and directory service accounts you have already setup. Click the button marked New Account.
- In the Account name box, enter your full e-mail address (ex. john@example.com). Under Account type the button beside POP should be pressed in, click OK to continue.
- In the Full Name box, enter in your first and last name.
- Enter in your e-mail address, then click Next to continue.
- The SMTP server should be set to your ISP's outgoing mail server. Your SMTP host is generally "mail." Followed by the domain name of your ISP (ex. mail.myisp.com).
- Your account ID should be your full e-mail address (ex. john@example.com).
- The POP server should be set to "mail." Followed by your domain name (ex. mail.example.com).
- Your password is your emailbox password.
- If you want your password to be saved for you every time you check your e-mail then put a check the box beside Save Password; however, if there are other people who have access to your computer then you might consider not checking it to increase your security.
- Click on the tab labeled Advanced. If you access your e-mail from more than one location, or if you wish to keep a copy on the server, check the box next to Leave a copy of messages on server.
- You are now ready to receive and send e-mail using Microsoft Outlook® Express on a Mac.
Back to top
Mozilla® Thunderbird
- Click on the "Tools" menu and select "Account Settings..."
- Click "Add Account".
- Select E-mail Account and click "Next".
- Enter Your Name and your full e-mail address (e.g. john@example.com). Click "Next".
- For Incoming Mail Server: Type: "mail." followed by your domain name (e.g. mail.example.com).
- Click "Next".
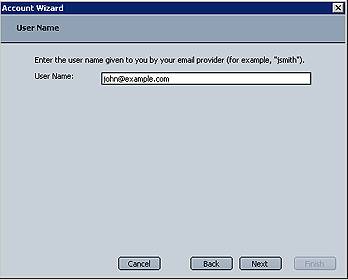
- For Incoming User Name: Type your full email address (e.g. john@example.com).
- For Account Name: Type your full email address (e.g. john@example.com).
- Click "Finish".
|
